What it’s for
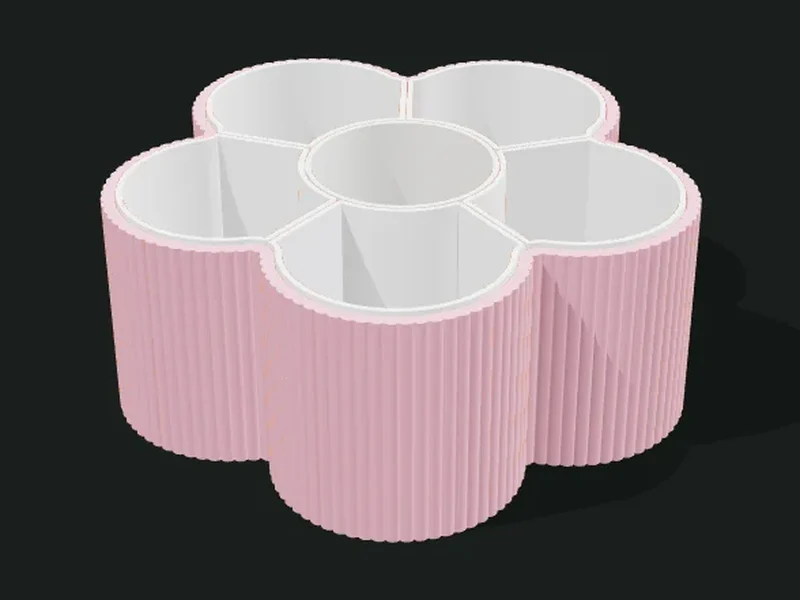
A container shaped like a flower seen from above: a round center surrounded by petals. Each petal and the center can be removable inserts printed separately, each in a different color, that fit into the shell. It can also be made with fixed dividers or as a single cavity.
Ideas
- Jewelry or hair clip organizer with each petal in a different color.
- Tray for candy, nuts or snacks at a party.
- Colorful pencil holder for kids, with a taller center.
- Mother’s Day gift or a centerpiece.
Step by step
- Choose a preset: «Pink flower», «Tall daisy» or «Built-in 4-leaf clover».
- In «Flower» choose how many petals, their radii and the spread, and smooth the joins.
- Adjust the height, the wall and the floor.
- In «Inserts» decide whether they’re removable, fixed dividers or a single cavity, and whether the center sticks up.
- Check the «Exploded» view to see the inserts and export: each insert comes out as a separate part.
Tips
- With removable inserts you can print the shell in one color and the petals in others, without a multicolor printer.
- If the inserts are tight, raise the clearance to 0.5 mm; if they wobble, lower it to 0.3 mm.
- An insert just above the rim (1–2 mm) is easy to grab and pull out.
- With a spread under 0.9 the petals overlap a lot with the center and the inserts end up small.
Presets
Parameters
Flower
The shape seen from above (petals and center), the height and the thicknesses.
Number of petals around the center. 4 gives a clover; 5–6 a classic flower; 7–9 a daisy.
Radius of each petal (circle). It sets the size of each outer compartment.
Radius of the central circle. It’s the middle compartment.
How far from the center each petal sits, relative to the radii. 1 leaves them touching the center; more than 1 separates them and the flower opens up; less than 1 overlaps them with the center.
Rounding of the notches between petals, seen from above. 0 leaves a sharp angle; 3–6 mm softens it.
Height of the shell. 40–60 mm for a tray; 90 mm or more for a pencil holder.
Thickness of the shell’s outer wall. 2–2.4 mm is sturdy.
Thickness of the shell’s floor. 2 mm is enough.
Inserts
How the inside is divided: removable inserts, fixed dividers or a single space.
«Removable inserts» makes one insert per petal plus a central one that lift out (print them in colors). «Built-in dividers» divides the inside with fixed walls in a single part. «Single cavity» leaves the whole inside as one space.
Play between each insert and its place in the shell. 0.3–0.5 mm goes in and out without jamming.
Thickness of each insert’s walls. 1.2–1.6 mm is sturdy without taking much space.
How far the inserts stick out above the shell’s rim. Positive they peek out (easier to remove); negative they sit sunk.
How much taller the central compartment is than the petals. 0 leaves it equal; 20–40 mm turns it into a pencil holder in the middle.
Outer texture
Decorative relief on the outer walls. It doesn’t change the inside sizes.
Relief on the outer walls. The texture is added outward: the inside and the wall thickness don’t change, so inserts and usable sizes stay the same. «Ribs» and «Flutes» are vertical, «Rings» horizontal, «Waves» helical and «Knurl» a diamond pattern that gives grip.
How far the texture sticks out (mm). 0.6–1 mm shows well without overdoing it; more than 2 mm adds a lot of material and print time.
Spacing between ribs, flutes or waves measured around the part. Small values give fine striping; large ones, bold. It should be at least 3 times the relief.
Vertical spacing between rings, waves or knurl diamonds. With 0.2 mm layers, less than 2 mm looks stepped.