What it’s for
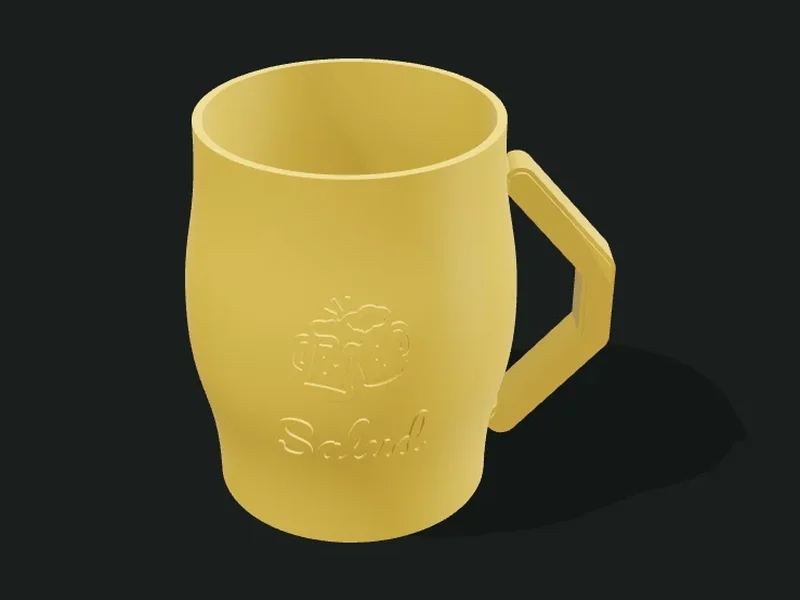
Personalized steins and mugs with a handle, in two versions. The sleeve wraps a regular drinking glass: you measure the glass, the app builds the shell with a handle to fit it and you drink from the glass, which washes as usual. The fully printed stein comes in straight, tapered, barrel or tulip shapes, and the app calculates the height for the capacity you ask for. In both, text, emoji or logo curved over the wall (raised, engraved or inlaid in another color), and the same sections and surface effects as the planters.
Ideas
- Personalized gifts: the name and an emoji on the sleeve of a beer glass.
- Merchandise for breweries, bars and football clubs with the logo in SVG.
- Bachelor parties, birthdays and weddings: one sleeve per guest with their name.
- Decorative mugs and steins with flutes, facets or sections that change with height.
Step by step
- Choose the «Type»: sleeve for a drinking glass (recommended) or fully printed stein.
- Sleeve: measure your glass on the outside (top and bottom diameter and height) and choose how much it covers. Stein: choose the shape and the capacity in ml (or the height).
- Adjust the wall, the section seen from above and the surface effects if you want.
- Choose the handle: the angular one prints without supports.
- Type the text, choose an emoji or load your SVG logo, and the finish: raised, engraved or inlaid.
- Print standing up, with the base on the bed.
Tips
- For daily drinking the sleeve is best: printed plastic has layer lines where residue stays, and the glass washes without problems.
- First print a short sleeve (lower «Sleeve height») to test the clearance with your glass.
- The fully printed stein needs a food-safe epoxy resin inside if it will be used for drinking. PETG handles washing better than PLA; neither goes in the dishwasher or with hot liquids.
- If you use surface effects, leave the engraving area smooth (with the effect’s «From / To» or a «Smooth zone»): it reads much better.
- The inlay in another color sits flush and is the neatest, but it needs a multicolor printer.
- With «Separate part» you print 20 plain sleeves and then the 20 names in another color, lying flat: they come out sharper and if one fails you reprint just that one.
Presets
Parameters
Type
Whether it’s a sleeve for a drinking glass or a fully printed stein.
«Sleeve»: a shell with a handle that wraps a regular drinking glass; you drink from the glass and it washes as usual (recommended). «Fully printed stein»: everything printed, for decoration or with food-safe resin inside.
Drinking glass
The dimensions of the glass that goes inside the sleeve and how it rests.
Outside diameter of the glass at the rim. Measure it with calipers or a ruler, edge to edge.
Outside diameter of the glass at the base, just above the bottom.
Total height of the drinking glass, from the table to the rim.
How much of the glass height the sleeve covers. 70–80 % leaves the rim free to drink comfortably.
Play between the glass and the sleeve. 0.4–0.6 mm fits snugly; raise it if your glass goes in tight.
«Closed»: the glass rests on the sleeve’s bottom. «Open ring»: the glass rests on a ledge and the bottom stays open (the glass shows and it uses less plastic).
Width of the ledge the glass rests on when the bottom is an open ring. 4–6 mm holds it well.
Mug
Shape, capacity and dimensions of the fully printed stein.
Shape of the stein seen from the side: straight, tapered (narrower at the bottom), barrel (with a belly in the middle) or tulip (with a waist and a flared mouth).
«Capacity»: you choose the ml and the app calculates the height. «Chosen height»: you set the height and the app tells you how many ml fit.
How much liquid it holds, measured up to 1 cm below the rim. 300–350 ml is a mug; 500 ml a stein; 1000 ml a pitcher.
Total height of the stein, from the base to the rim. The app tells you in the notes how many ml fit.
Outside diameter of the stein at the rim. 80–90 mm is comfortable to drink from.
Outside diameter of the stein at the base. A wide base makes it more stable.
In the barrel, how much the middle widens; in the tulip, how much the waist narrows.
Thickness of the stein’s bottom. A thick bottom gives it weight and makes it more stable on the table.
Wall
The wall thickness and the twist of the shape.
Thickness of the wall. 2.4–3 mm is sturdy; surface effects are added on the outside.
How many degrees the section rotates from bottom to top: with cornered sections it gives a swirl.
Section (top view)
The shape seen from above: a single one, or one at the bottom and another at the top that morph into each other.
Shape seen from above: round, polygon, star, flower, rounded square or drawn in the editor.
Section of the stein drawn in a window seen from above: you draw a segment that repeats around («Symmetry»), with «Mirror» for petals or teeth, and each point is smooth or a corner.
Number of sides of the polygon or points of the star or flower.
How pronounced the points of the star or the petals of the flower are, as a fraction of the radius.
Rounding of the corners of the stein’s polygon: 0 leaves a sharp edge (hard); as you raise it the corners soften, and at 1 the section becomes round.
Top shape of the stein. With «Same as bottom» the section is the same over the whole height; if you choose another, the stein morphs from the bottom section to the top one.
The drawn section used at the top. It’s edited in the same window seen from above.
Number of sides or points of the top section (polygon, star or flower).
How pronounced the points or petals of the top section are, as a fraction of the radius.
Rounding of the corners of the top section, from hard (0) to soft (1).
A third shape halfway up the stein: it goes from the bottom section to the middle one and from there to the top one.
The drawn section used halfway up. It’s edited in the same window seen from above.
Number of sides or points of the middle section (polygon, star or flower).
How pronounced the points or petals of the middle section are, as a fraction of the radius.
Rounding of the corners of the middle section, from hard (0) to soft (1).
«Smooth» changes more in the middle and barely at the ends; «Even» changes the same over the whole height; «Changes early» morphs near the bottom; «Changes late», near the top.
Surface effects
Relief added on the outside, as in the planters, and the mesh quality.
Surface relief added on the outside (flutes, facets, honeycomb, smooth zone…), as in the planters. Leave the engraving area smooth so it reads well.
How fine the surface mesh is. «Normal» is enough for designing; «High» or «Maximum» to export with fine effects.
Handle
The style, size and height of the handle.
«Angular»: the arms go at 45°, so it prints standing up without supports. «Curved»: the classic C (the top, inside, may need supports). «Ring»: a loop for the finger, like coffee cups.
How far the grip stands off the wall. 22–30 mm leaves room for four fingers.
Diameter of the ring’s hole. 20–24 mm fits a finger comfortably.
Thickness of the handle seen from the side. 8–10 mm is sturdy in PLA or PETG.
Width of the handle (from the front). 12–16 mm is comfortable for the hand.
Height where the handle joins at the bottom, in % of the stein’s or sleeve’s height.
Height where the handle joins at the top, in % of the stein’s or sleeve’s height.
3D ornament
Your own STL (a flower, a leaf, a shield) curved over the wall, fused or as a separate part.
Your own STL (a flower, a leaf, a shield, a butterfly) that curves over the wall of the stein: its back follows the surface, even with a belly, twist, drawn section or effects. Flat-backed, bas-relief style models work best; it must be a closed solid.
Which side of the STL faces outward. «Automatic» takes the model’s smallest dimension as the thickness, so it lies flat whether it comes lying down or standing up. If the ornament ends up backwards or edgewise, choose the face by hand: top (model lying down), front (standing) or side.
«Seat the whole back»: measures the ornament’s underside and gently flattens it against the wall, keeping the thickness and relief of the front; a curved leaf or flower sits fully attached, with no air underneath. «As is»: the model isn’t deformed and only its lowest part sinks into the wall.
Height of the ornament on the wall. Width and relief grow in the same proportion.
Rotates the ornament on the wall (for example, to tilt a flower or set a leaf diagonally).
Height of the ornament’s center, in % of the height of the stein.
Where it goes around: 0° is the front of the view, 90° the right side, 180° the back.
How many copies of the ornament are spread around (for example, 6 flowers around the planter).
How far the back of the ornament goes into the wall so it stays attached. It never exceeds 70 % of the wall, so it doesn’t go through.
«Fused»: the ornament becomes one body with the part. «Separate part»: it comes out just as the STL came, to print in another color and glue on; the wall gets a 0.4 mm mark with its outline. With the Ultra and Extreme qualities it always comes out separate.
Customization
Text, emoji or logo curved over the wall, and its finish.
The personalization text: a name, a phrase or a date. You can include emojis.
A smaller second line under the main text.
Adds an icon: an emoji or your own SVG logo (for example, a club’s crest or a brewery’s logo).
The personalization emoji. Choose one from the list or paste any emoji from the keyboard.
Your logo in SVG format. Drawings with filled strokes and no gradients work best.
Height of the icon or logo. It shrinks by itself if it doesn’t fit on the wall.
Where the icon goes relative to the text: above, left, right, or just the icon without text.
Font of the text. Handwritten looks nice on gifts; condensed fits better in small spaces.
Height of the letters. If the personalization doesn’t fit on the wall, it shrinks by itself and tells you.
«Front»: looking at the stein with the handle on the right. «Opposite the handle»: on the side seen by someone drinking with the right hand. «Front and back»: on both sides.
Height of the personalization’s center, in % of the stein’s or sleeve’s height.
«Raised»: sticks out of the wall. «Engraved»: sunk into the wall. «Inlaid»: sunk and filled with another part in another color, flush (needs a multicolor printer). «Separate part»: the design comes out as a flat part to print lying down (sharper and in another color with any printer) and the stein gets a sunk mark where it’s glued; warm it with a hair dryer to fit it to the curve.
How far the relief sticks out or how deep the engraving goes; for the separate part, how far it sticks out once glued. On engravings it’s limited automatically so it doesn’t go through the wall.