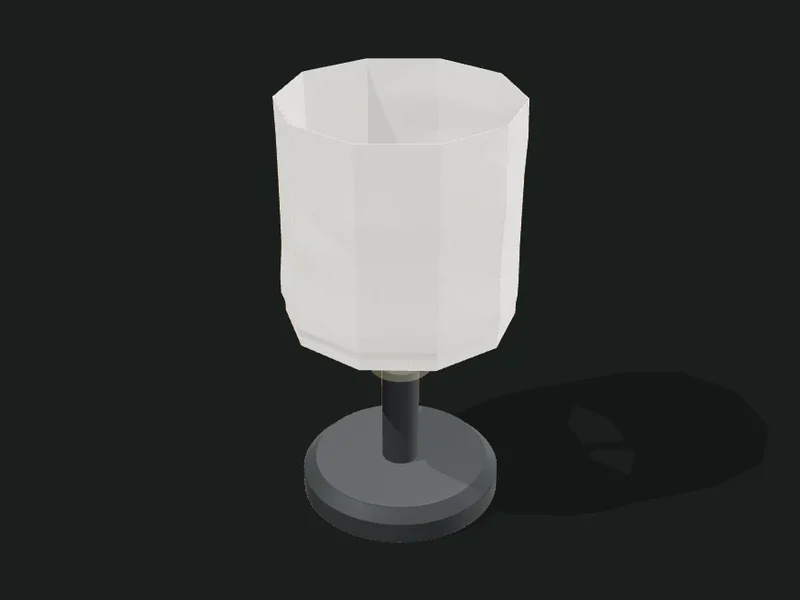
What it’s for
Shades for table lamps and pendant lamps, designed with the same curve and effects editor as the planters. The shade is a single wall of even thickness (from 0.6 mm) that follows the texture, so the light passes through evenly and the relief shows as a pattern when it’s on. At the bottom or top it has a spider that fits an E27/E14 socket, or a cradle for the Bambu Lab LED kit (USB, 5 V, no mains wiring). For table lamps, it also designs the base: turned with its own profile and effects, or with legs, with socket fixing, cable exit, switch, a cavity for counterweight and recesses for felt pads.
Ideas
- Complete table lamp (shade + base) for the nightstand.
- Pendant lamp for the dining room or kitchen.
- Decorative lamp with the Bambu Lab LED kit, without 220 V wiring.
- Replacement shade for a lamp you already have.
Step by step
- Choose a preset. Those starting with «Bambu kit» use the Bambu Lab LED module.
- In «Mounting» choose the light source: 220 V socket or the Bambu Lab LED kit.
- With a socket, choose table lamp or pendant and the socket size (measure its thread).
- In «Shape» open the profile editor and give it its silhouette; choose section and twist.
- In «Surface effects» add relief: with the light on it looks darker.
- For a table lamp, set up the base: style, profile or legs, cable, switch and counterweight.
- Check the warnings (tipping, heat, holes) and export. Shade, base and lids come out as separate parts.
Tips
- With 220 V sockets use only LED bulbs: an incandescent bulb heats up and deforms PLA.
- Print the shade in white or natural PLA, with 1 or 2 perimeters and no infill: the even wall is what gives uniform light.
- If the app warns that the lamp may tip over, enlarge the base or turn on the counterweight cavity and fill it with sand.
- With the Bambu Lab kit the shade can stand on its own, without a base: the module’s cradle goes at the bottom and the cable exits through a notch.
- The 220 V wiring (nipple, cable, switch) must be done by someone who knows how: the app only leaves the holes.
Presets
Parameters
Shape
The shade’s silhouette (profile), its size, the section seen from above and the twist.
Silhouette of the shade seen from the side: each point has a radius (distance to the axis) and a height. Tap the thumbnail to open the editor, where you can drag, add or remove points and curve with the handles. The editor comes with ready profiles (empire, drum, bell, globe, tulip, mushroom and others).
Enlarges or shrinks the shade evenly (100 % = profile size). It doesn’t change the wall thickness or the spider.
Shape of the shade seen from above: round, polygon, star, flower or rounded square.
Section of the shade drawn in a window seen from above: you draw a segment that repeats around («Symmetry»), with «Mirror» for petals or teeth, and each point is smooth or a corner.
Number of sides of the polygon or points of the star or flower.
How pronounced the points of the star or the petals of the flower are, as a fraction of the radius.
Rounding of the corners of the shade’s polygon: 0 leaves a sharp edge (hard); as you raise it the corners soften, and at 1 the section becomes round.
Top shape of the shade. With «Same as bottom» the section is the same over the whole height; if you choose another, the shade morphs from the bottom section to the top one.
The drawn section used at the top. It’s edited in the same window seen from above.
Number of sides or points of the top section (polygon, star or flower).
How pronounced the points or petals of the top section are, as a fraction of the radius.
Rounding of the corners of the top section, from hard (0) to soft (1).
A third shape halfway up the shade: it goes from the bottom section to the middle one and from there to the top one.
The drawn section used halfway up. It’s edited in the same window seen from above.
Number of sides or points of the middle section (polygon, star or flower).
How pronounced the points or petals of the middle section are, as a fraction of the radius.
Rounding of the corners of the middle section, from hard (0) to soft (1).
«Smooth» changes more in the middle and barely at the ends; «Even» changes the same over the whole height; «Changes early» morphs near the bottom; «Changes late», near the top.
How many degrees the section rotates from bottom to top. With a polygonal section it gives a swirl effect.
Surface effects
Relief added to the shade. The wall thickens where there’s relief: with the light on the pattern looks darker.
List of surface effects (flutes, spiral, honeycomb, voronoi, bubbles, facets, waves and more). The wall thickens where there’s relief: with the light on those areas look darker and the pattern stands out. See the «Surface effects» page.
How fine the mesh is. Design in «Draft» or «Normal» and switch to «High» before exporting; «Maximum» for very fine effects. «Ultra» and «Extreme» build the shade directly, with millions of triangles and very clean edges; the table lamp base goes up to «Maximum», and so does the kit cradle without a base. The file is big: export as 3MF.
3D ornament
Your own STL (a flower, a leaf, a shield) curved over the wall, fused or as a separate part.
Your own STL (a flower, a leaf, a shield, a butterfly) that curves over the wall of the shade: its back follows the surface, even with a belly, twist, drawn section or effects. Flat-backed, bas-relief style models work best; it must be a closed solid.
Which side of the STL faces outward. «Automatic» takes the model’s smallest dimension as the thickness, so it lies flat whether it comes lying down or standing up. If the ornament ends up backwards or edgewise, choose the face by hand: top (model lying down), front (standing) or side.
«Seat the whole back»: measures the ornament’s underside and gently flattens it against the wall, keeping the thickness and relief of the front; a curved leaf or flower sits fully attached, with no air underneath. «As is»: the model isn’t deformed and only its lowest part sinks into the wall.
Height of the ornament on the wall. Width and relief grow in the same proportion.
Rotates the ornament on the wall (for example, to tilt a flower or set a leaf diagonally).
Height of the ornament’s center, in % of the height of the shade.
Where it goes around: 0° is the front of the view, 90° the right side, 180° the back.
How many copies of the ornament are spread around (for example, 6 flowers around the planter).
How far the back of the ornament goes into the wall so it stays attached. It never exceeds 70 % of the wall, so it doesn’t go through.
«Fused»: the ornament becomes one body with the part. «Separate part»: it comes out just as the STL came, to print in another color and glue on; the wall gets a 0.4 mm mark with its outline. With the Ultra and Extreme qualities it always comes out separate.
Mounting
Which light it uses and how the shade is held: spider for a socket or cradle for the LED kit.
«E27 / E14 socket»: regular 220 V bulb. «Bambu Lab LED kit»: Bambu Lab’s round module with a USB cable; it needs no electrical installation and barely heats (3 W).
«Table lamp»: the ring with the spider goes at the bottom and the shade rests on a base’s socket. «Pendant»: the ring goes at the top and the shade hangs from the ceiling socket. «No mounting»: just the shade.
Socket size: E27 (big thread, the common one) or E14 (small thread). The hole is approximate: measure the outer thread of yours and, if it doesn’t match, choose «Other size».
Diameter of the spider ring’s hole with a custom size. Measure the socket’s outer thread and add half a millimeter.
Number of spokes joining the central ring to the shade. Between spokes it’s open: heat escapes and light passes.
«Wavy wall of even thickness»: a wall that follows the texture, with mounting (the normal choice for lamps). «Solid for vase mode»: the solid volume to print in spiral mode, without a spider (you have to solve the mounting separately).
Thickness of the shade’s wall. 0.6–0.8 mm (one or two passes of a 0.4 nozzle) lets a lot of light through; thicker is sturdier but darker.
Bambu Lab LED kit
How the round Bambu Lab LED module (Ø 59 × 18 mm, USB 5 V) is housed.
Play per side between the LED module and its cradle. Three ribs grip it evenly; 0.3 mm fits firmly without forcing.
Adds two pilot holes for the BT3×12 self-tapping screws that come with the kit, if you want to fix the module besides the snap fit.
Distance between the centers of your module’s two holes. Measure it on yours.
Diameter of the kit’s USB cable, for the channel it exits through.
Which way the cable exits, seen from above: 0° = back, 180° = front. It exits between two spokes, through a notch in the rim.
Raises the LED module inside the shade on a pedestal (the cable runs down inside). That way the light sits more centered in tall shades. 0 leaves it at the bottom.
Lamp base
The table lamp’s foot: turned (with profile and effects) or with legs.
Includes the table lamp base. With the Bambu Lab kit, without a base the shade stands on its own and has the module’s cradle at the bottom.
«Turned»: solid base with its own curve profile and effects, like a classic lamp foot. «With legs»: a central column with splayed legs, lighter.
Silhouette of the base seen from the side. It’s edited like the shade profile and comes with ready shapes (baluster, block, pedestal, drop, cut sphere and others).
Enlarges or shrinks the base evenly, without changing the cable or socket holes.
Shape of the base seen from above: round, polygon, star, flower or rounded square.
Section of the base drawn in a window seen from above: you draw a segment that repeats around («Symmetry»), with «Mirror» for petals or teeth, and each point is smooth or a corner.
Number of sides or points of the base’s section.
How pronounced the points of the base’s star or flower are.
Rounding of the corners of the base’s polygon: 0 leaves a sharp edge (hard); as you raise it the corners soften, and at 1 the section becomes round.
Top shape of the base. With «Same as bottom» the section is the same over the whole height; if you choose another, the base morphs from the bottom section to the top one.
The drawn section used at the top. It’s edited in the same window seen from above.
Number of sides or points of the top section (polygon, star or flower).
How pronounced the points or petals of the top section are, as a fraction of the radius.
Rounding of the corners of the top section, from hard (0) to soft (1).
A third shape halfway up the base: it goes from the bottom section to the middle one and from there to the top one.
The drawn section used halfway up. It’s edited in the same window seen from above.
Number of sides or points of the middle section (polygon, star or flower).
How pronounced the points or petals of the middle section are, as a fraction of the radius.
Rounding of the corners of the middle section, from hard (0) to soft (1).
«Smooth» changes more in the middle and barely at the ends; «Even» changes the same over the whole height; «Changes early» morphs near the bottom; «Changes late», near the top.
Twist of the base from bottom to top. Use the same as the shade so they match.
Surface effects of the base. They’re the same as the shade’s: use the same ones so they match.
Number of legs. 3 is the most stable on uneven surfaces; 4–6 gives a more solid look.
How far from the center the legs rest. Wider, the lamp is more stable.
Total height of the legged base, up to where the socket sits.
Diameter of the central column the nipple and cable go through.
Thickness of each leg. 6 mm or more is sturdy for a regular table lamp.
Leg shape: straight (tripod), curved inward (slender and elegant) or curved outward (sturdy).
Adds a ring on the floor joining the tips of the legs. It makes them stiffer and more stable.
Base: cable and switch
Where the socket goes through, where the cable exits and where the switch goes.
How the socket is fixed to the base. The nipple is the hollow threaded tube used in lamp making: the socket screws on top and is tightened with a nut underneath. M10 is the most common. «Printed M10×1 thread» makes the thread in the base, without a nipple.
Diameter of the hole for a nipple of another size. Measure the nipple and add half a millimeter.
«Through the side»: the cable exits through a hole in the side of the base. «Underneath»: it exits through a channel in the sole, so the base sits flat.
Height at which the cable exits the side of the base, measured from the bottom.
Which way the cable exits, seen from above: 0° = back, 180° = front.
Diameter of the cable (or the grommet). With the Bambu Lab kit the exit is made the size of the USB plug.
Leaves a recess around the cable exit for a rubber grommet, which protects the cable from the edge.
Adds a hole for a switch in the base: round (toggle or push button) or rectangular rocker. It needs the cavity underneath for wiring, so that turns on by itself.
Diameter of the round switch’s hole. Measure the thread of yours.
Width of the rectangular rocker’s opening. Measure your switch.
Height of the rectangular rocker’s opening. Measure your switch.
Where the switch goes around the base: 0° = back, 180° = front.
Height of the switch on the base, measured from the bottom.
Base: weight and sole
Cavity for counterweight and recesses for felt pads on the sole.
Hollows out the base from below, with a 45° ceiling (prints without supports), and adds a snap-on lid. Fill it with sand, shot or washers so the lamp doesn’t tip over.
Thickness of the wall left around the base’s cavity. 3 mm is sturdy.
Recesses in the sole to glue felt pads or rubber feet, which protect the furniture and keep it from sliding.
Diameter of the felt pads you’ll glue on.