What it’s for
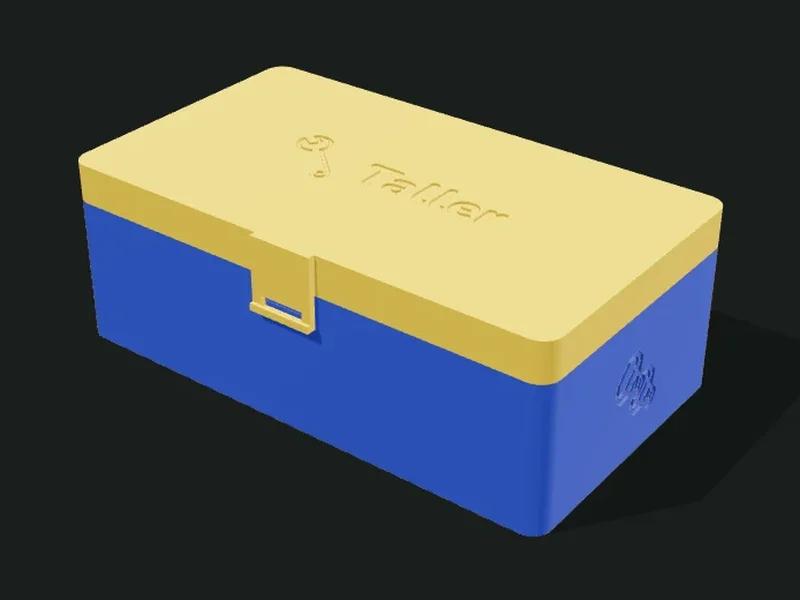
A box with a lid joined by a hinge and closed with a snap latch. The hinge uses a piece of 1.75 mm filament (or a printed pin) as its axle, going through the knuckles of the box and the lid. It can have compartments, so it works for pill boxes, screw boxes, cases or jewelry boxes.
Ideas
- 7-compartment weekly pill box.
- Box for screws, bits or drill bits to carry in the tool bag.
- Pencil or glasses case.
- Jewelry box with a lid, or a gift box with a clasp.
Step by step
- Choose a preset: «Screw box», «Weekly pill box», «Pencil case» or «Jewelry box».
- In «Box» adjust width, depth and the heights of the box and the lid.
- In «Compartments» divide the box into columns and rows.
- In «Hinge» choose how many knuckles, their diameter and the type of axle.
- Adjust the latch and export. Box and lid come out as separate parts.
- To assemble: line up the knuckles and push in a piece of 1.75 mm filament; cut it flush.
Tips
- If the filament doesn’t go through the knuckles, run a 1.8 mm drill bit through them or raise the clearance between knuckles.
- If the latch is too hard to open, lower the tooth grip; if it opens by itself, raise it.
- Print box and lid with the open side up (they already come that way on the bed).
- For very small boxes use 3 knuckles; for long ones, 7 or 9 so the lid doesn’t twist.
- To personalize it, type a name or choose an emoji in «Lid personalization» or «Wall personalization». On the lid, the inlay comes out perfect with a single filament change.
- On the walls, raised and inlaid designs need a multicolor printer (AMS, MMU); with a single color use «Engraved».
Presets
Parameters
Box
Dimensions of the box and the lid, thicknesses and closing lip.
Outer width of the box, from left to right (X axis). The hinge goes on the back side, along this width.
Outer depth, from the front (latch) to the back (hinge).
Height of the box (the bottom part) without the lid.
Height of the lid. A tall lid leaves more room inside (for example for thick pencils).
Rounding of the corners seen from above.
Thickness of the box and lid walls. 1.6–2 mm is sturdy.
Thickness of the box’s floor and the lid’s top.
Height of the lip that comes down from the lid and goes into the box when it closes. It centers the lid and keeps it from shifting. 0 removes it.
Compartments
Inner divisions of the box.
Compartment columns (left to right) and their relative width. «1» leaves a single space.
Compartment rows (front to back) and their relative depth.
Thickness of the inner dividers. 1.2 mm is enough for small boxes.
How much lower than the rim the dividers are. With a little (1–2 mm) the lid’s lip doesn’t hit them.
Hinge
The alternating knuckles of box and lid, and the axle that joins them.
Number of hinge knuckles (always odd: they alternate box, lid, box…). More knuckles, sturdier hinge.
Outer diameter of each knuckle. 6–8 mm is usual; thicker is stronger.
«1.75 mm filament» uses a piece of filament as the axle (the simplest and firmest). «Printed pin» adds a pin printed separately and inserted.
Play between neighboring knuckles and around the axle. 0.3–0.5 mm turns without jamming.
Latch
Tab with a tooth that snaps the lid shut.
Adds a tab at the front of the lid with a tooth that hooks onto the box when closing.
Width of the latch tab. Wider is firmer.
How far the tab comes down from the lid over the front of the box. Longer flexes more easily.
How far the latch tooth sticks out. More grip closes more firmly but is harder to open; 0.8–1 mm is a good balance.
Lid customization
Text, emoji or SVG image on the top face of the lid.
Text that goes on the lid. It can have emojis mixed in (e.g.: «Treasures 💎»). It shrinks by itself if it doesn’t fit.
Second line of text on the lid, smaller than the first (for example a name under the title).
Height of the letters on the lid, in millimeters. If the text doesn’t fit, the app shrinks it and tells you in the notes.
Adds a drawing on the lid: an emoji from the list or your own SVG image (a logo, a silhouette).
The emoji used as the drawing on the lid. It becomes raised or engraved following its shapes.
Your own SVG image for the lid, for example a logo. It’s best if it has filled shapes and no very thin lines.
Height of the drawing on the lid, in millimeters. If it doesn’t fit together with the text, everything shrinks proportionally.
Where the drawing goes relative to the text on the lid: left, right, above, or just the drawing without text.
How the lid personalization looks: inlaid flush in another color (it comes out in the first layers, because the lid prints upside down) or engraved, sunk into the lid.
Wall customization
Text, emoji or SVG image on one or more walls of the box.
Which walls the personalization goes on: front (under the latch), back (under the hinge), one side, both sides or all four walls.
Text that goes on the walls. It can have emojis mixed in (e.g.: «Treasures 💎»). It shrinks by itself if it doesn’t fit.
Second line of text on the walls, smaller than the first (for example a name under the title).
Height of the letters on the walls, in millimeters. If the text doesn’t fit, the app shrinks it and tells you in the notes.
Adds a drawing on the walls: an emoji from the list or your own SVG image (a logo, a silhouette).
The emoji used as the drawing on the walls. It becomes raised or engraved following its shapes.
Your own SVG image for the walls, for example a logo. It’s best if it has filled shapes and no very thin lines.
Height of the drawing on the walls, in millimeters. If it doesn’t fit together with the text, everything shrinks proportionally.
Where the drawing goes relative to the text on the walls: left, right, above, or just the drawing without text.
How the wall personalization looks: raised or inlaid flush in another color (they need a multicolor printer) or engraved, sunk into the wall.
Letters and drawings
Font, depth and line thickness for all the personalization.
Font for all the texts on the lid and the walls: rounded, condensed or handwritten.
How far the relief sticks out or how deep the engraving or inlay goes. It’s limited automatically so it doesn’t go through the wall or the lid’s top.
Thickens the thin strokes of emojis and images so they come out well with a 0.4 mm nozzle.
Outer texture
Decorative relief on the outer walls. It doesn’t change the inside sizes.
Relief on the outer walls. The texture is added outward: the inside and the wall thickness don’t change, so inserts and usable sizes stay the same. «Ribs» and «Flutes» are vertical, «Rings» horizontal, «Waves» helical and «Knurl» a diamond pattern that gives grip.
How far the texture sticks out (mm). 0.6–1 mm shows well without overdoing it; more than 2 mm adds a lot of material and print time.
Spacing between ribs, flutes or waves measured around the part. Small values give fine striping; large ones, bold. It should be at least 3 times the relief.
Vertical spacing between rings, waves or knurl diamonds. With 0.2 mm layers, less than 2 mm looks stepped.