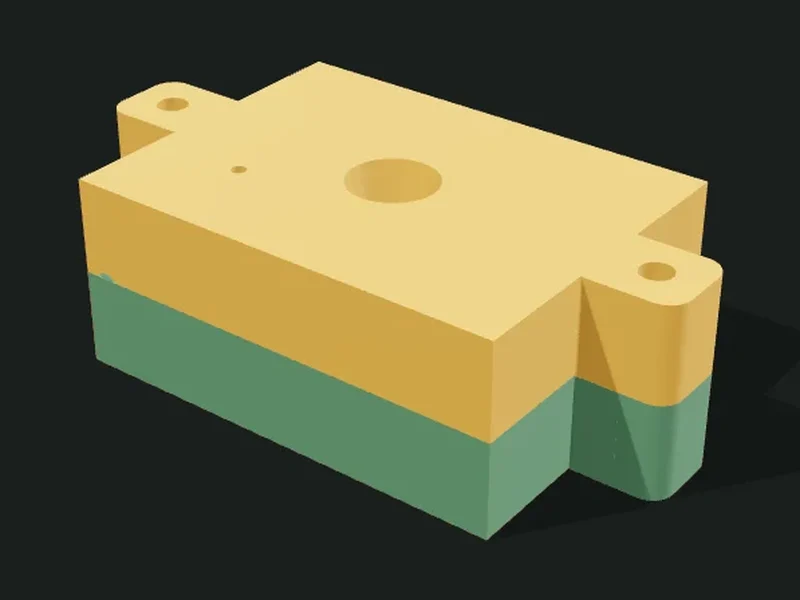
What it’s for
Generates molds to copy a figure (your STL or one of the samples) in another material: plaster, cement, resin, soap, wax or silicone. It has five systems. (1) Printed rigid mold, in 2 parts or segments, that you cast into directly. (2) Box to pour silicone around the figure. (3) Mother mold: a thin silicone «glove» held by a printed shell. (4) Boxes to make a plaster mold for slip-cast ceramics. (5) Cement planter mold with a core. The app calculates the volume, weight and mix of the material, the silicone needed and the mold’s plastic, and warns you if the pouring temperature could deform the plastic. For production: several cavities per mold, your brand engraved on the mold and on each part, screwless clips, pillars against air pockets, latex skins and a hollow original to print in resin.
Ideas
- Handmade soaps and candles (with a centered wick) in a rigid PETG mold.
- Plaster or resin figures from a 3D model, with a silicone mold.
- Cement planters with an even wall and a drainage hole.
- Plaster molds for ceramics: vases, bowls and cups in slip.
- Batch production: 6 soaps or 4 candles per pour, with your brand on each part.
- Masks and latex or silicone skins with an even thickness.
Step by step
- Choose the mold «Type» according to the material and the shape (see the tips below).
- In «Figure» load your STL (it must be a closed solid) or try a sample. Adjust scale and rotation until it stands the way you want to cast it.
- If your STL is a cup or planter with a wall, turn on «Fill cavities» so the mold copies only the outer shape.
- In «Material» choose what you’ll cast and which plastic you print the mold in: the app warns you if it may deform.
- Adjust the options of the chosen system (how it opens, keys, closure, silicone or plaster thickness).
- If the part has to come out hollow (planter, container candle), set up the «Core».
- Check the sprue and the vents in «Pouring», look at the «Section» view to see the cavity inside and export.
Tips
- Rigid: the fastest for soap, wax, plaster and cement. If the figure has a belly or protrusions, use vertical segments so it opens without locking.
- Silicone: for figures with details or undercuts (dolls, animals). The «Follows the figure» box or the mother mold save a lot of silicone.
- Always apply release agent: the warnings panel tells you which one suits the material. Epoxy sticks to plastic if you don’t protect it.
- Paraffin is poured at about 75 °C: with PLA the mold deforms. Use PETG or ABS.
- For ceramics, slip shrinks when drying and firing (10–14 %): enter that value in «Compensate shrinkage».
- Look at the «Section» view: if you see the cavity cut by the sprue or a badly placed vent, adjust it before printing.
Presets
Parameters
Mold type
Which mold system is generated. Each type shows only its own options.
«Rigid mold»: the printed mold is what receives the material (soap, wax, plaster, cement, resin). «Box to pour silicone»: you print a box, place the figure and pour silicone; then you use the silicone as the mold. «Mother mold»: an even, thin layer of silicone held by a printed shell (saves silicone). «Plaster mold for slip casting»: boxes to pour the plaster of a ceramic mold. «Cement planter»: outer mold and core for a planter, without an STL.
Figure
The part you want to copy: your STL or a sample, its size and its orientation.
The figure to copy: your own STL file, or one of the samples to try the system before loading yours.
Your STL file. It must be a closed solid (no holes in the mesh). If the app says it isn’t, repair the file in the slicer or in a program like Meshmixer.
Size of the figure as a percentage of the original. 100 % leaves it as is; 50 % makes it half the size.
Rotates the figure around the X axis (forward or backward), in 90° steps, to leave it in the position you’ll cast it in.
Rotates the figure around the Y axis (sideways), in 90° steps.
For STLs of cups, planters or vases that have a wall: it closes the inside and also handles and through-holes, so the mold copies only the outer shape. If you want the part hollow, use the «Core» afterwards.
Enlarges the figure to compensate for what the material shrinks when drying or cooling, so the final part comes out to size. Wax ≈ 1–2 %, resin ≈ 0.5–1 %, slip-cast ceramics ≈ 10–14 %. Plaster and cement barely shrink: leave 0.
Production
For batch production: several cavities in the same mold and the hollow original to print in resin.
How many copies of the figure the same mold has, in a grid. Each cavity has its own sprue, its vents and, for candles, its wick: you cast several parts at once. It works in the horizontally split rigid mold and in the silicone box. With more than one cavity no core is used.
Distance between one cavity and the next. 8–12 mm leaves a sturdy wall between parts; more spacing makes the mold bigger.
Adds a hollowed original, with an even wall and two drain holes in the base, to print the master model in resin using much less. On FDM printers it isn’t needed: the infill already hollows it.
Wall thickness of the hollow original. 1.5–2.5 mm is sturdy in resin; with less it may deform when curing.
Engraving
Your brand, a text or the volume to pour, engraved on the mold or on the base of each part.
Engraves (sunk) a text, emoji or logo on a face of the mold: at the front on the rectangular block, underneath if it follows the figure, on the wall of the silicone box or under the base of the mother mold. Useful to identify molds and note how much material to prepare.
Engraves your brand on the base of each cast part (soaps, candles, plaster). It’s made on the floor of the rigid mold’s cavity, so the figure has to rest on a flat face. With vertical segments it needs «Separate bottom».
The engraving text: your brand, the product name or a date. You can include emojis. If it doesn’t fit, it shrinks by itself.
Adds a line with the volume and material to pour to the mold engraving (for example «6 × 95 ml · soap»), so you know how much to prepare each time without recalculating.
Adds an icon to the left of the text: an emoji or your own SVG logo (for example exported from Inkscape or Illustrator).
The engraving’s emoji. Choose one from the list or paste any emoji from the keyboard.
Your logo in SVG format. Drawings with filled strokes and no gradients work best.
Font of the engraved text. Rounded reads well at small sizes; condensed fits better in narrow spots.
Height of the engraving letters. 6–10 mm reads well on soaps and molds; if it doesn’t fit on the face, it shrinks by itself.
«Sunk»: the letters go into the part (the mold has the relief). «Raised»: the letters stick out of the part’s base (the mold has the channel).
Depth of the engraving. 0.6–1 mm shows well without weakening the mold; it’s limited automatically so it doesn’t go through thin walls.
Material
What you’ll cast and which plastic the mold is printed in.
The material you’ll cast. The app calculates the volume, weight and mix (for example how much water for the plaster), recommends a release agent and warns you if the pouring temperature could deform the mold’s plastic.
Plastic you print the rigid mold in. PLA softens at about 55 °C (fine for plaster, cement, resin and warm soap); PETG withstands about 75 °C (soap, soy wax); ABS or ASA about 95 °C (paraffin).
Rigid mold
How the printed mold is split, how its parts are aligned and how it closes.
«Horizontal split»: two-part mold, bottom and top. It’s best for flat figures (soaps, medals). «Vertical in 2 halves, 3 or 4 segments»: the mold opens sideways. It works for curved silhouettes (pot-bellied planters, vases, rounded figures), which then come out without locking.
Also cuts each half or segment in height, into a bottom and a top piece, with conical keys at the cut. Useful for tall molds that don’t fit on the bed or take too long to print in one go.
Height of the segments’ split, in % of the mold height. Move it so the cut doesn’t go through a detail of the figure; it shifts by itself if it falls on a strap channel.
With vertical splits, it makes the bottom a separate piece the segments rest on. That way the mold is assembled on the table and the part is demolded by pulling the segments sideways.
«Rectangular box» is a simple block. «Follows the figure» makes the mold copy the part’s outline with the chosen wall: it saves a lot of plastic and print time.
Minimum thickness of plastic between the cavity and the outside of the mold. 6–10 mm is sturdy; with cement or big parts, raise it.
Automatically finds the split height (or angle) that leaves the fewest undercuts, that is, the fewest spots where the part would lock when opening. Turn it off to choose the split by hand.
Height of the horizontal split, in % of the figure’s height. It normally goes at the widest part of the figure, so both halves open without locking.
Rotates the vertical split planes around the figure. Move it so the cuts don’t go through important details (a face, a logo).
Adds registration keys: male cones on one part and female recesses on the other, so the mold’s parts always line up in the same place.
Diameter of the registration keys. They shrink by themselves if the wall isn’t enough. In plaster molds use at least 12 mm, because plaster is brittle.
Play between keys, lip and funnel. 0.3 mm fits firmly on most printers; raise it if your parts come out tight.
Adds a male-female rim around the cavity, at the joint. It centers the parts and stops material leaking through the joint.
How the closed mold is tightened: «Ears with screws» (holes with nuts), «Printed clips» (U-shaped pieces that snap on from the side, no screws; only with a horizontal split, better in PETG), «Channels for straps or rubber bands» (grooves around it for elastic bands or zip ties), or nothing (you use clamps). With 3 or 4 segments channels are used.
Size of the screws that close the mold. M4–M5 is enough for small molds; M6–M8 for big ones.
The nut stays embedded in a hexagonal pocket in the mold: it sits flat and closes with a single wrench.
Plaster for slip casting
Printed boxes where the plaster that forms the ceramic mold is poured.
How many plaster pieces the mold is made of. Bowls and cups that open upward come out of 1 piece; pot-bellied vases need 2, 3 or 4 segments.
Thickness of the plaster around the figure. 20–30 mm absorbs the slip’s water well and withstands many pours.
Reserve of slip above the part’s opening, like a funnel. It feeds the wall while the plaster absorbs water, so the rim doesn’t come out low.
Thickness of the walls of the printed boxes where you pour the plaster. 2–2.4 mm holds the weight of wet plaster.
Silicone
The box where the silicone is poured or the mother mold’s shell.
«1 part»: the silicone forms a block the part is removed from below (figures without big undercuts). «2 parts»: it’s poured in two steps with a parting board and the mold opens in two (complex figures).
«Rectangular» is a simple box. «Follows the figure» makes the box copy the part’s outline with the chosen thickness: it saves a lot of silicone.
Thickness of the silicone around the figure. 6–10 mm is sturdy; less saves silicone but the mold deforms more when casting.
Thickness of the mother mold’s printed shell, which holds the silicone layer. 2.4–3 mm is rigid.
The figure is printed joined to the base and acts as the core: what you pour between the figure and the mother mold is the final part, a skin of even thickness. For masks and latex or silicone skins. In this mode no registration keys are used.
Finds the areas of the figure facing down where silicone would trap air (for example under a mushroom cap) and adds a column from the base to each one. The columns are attached to the original you print.
Diameter of the pillars. 4–6 mm is enough; thicker leaves a bigger stub to cut on each copy.
Adds small cones on the shell that leave dimples in the silicone: that way the silicone glove always seats the same way in the shell.
Core (hollow part)
An inner part that leaves the casting hollow (planters, container candles, pencil holders).
Adds an inner part so the casting comes out hollow. «Follows the shape» leaves an even wall (planters). «Cone» is easier to demold (candle holders, cups). «No core» makes the part solid.
Wall thickness of the cast part (what’s left between the core and the mold). In cement, 8–12 mm; in plaster or resin, less.
Bottom thickness of the cast part (what’s left between the core and the mold’s base).
Diameter of a hole in the part’s bottom (planter drainage). 0 doesn’t make one.
Pouring
Where the material goes in and where the air comes out.
Adds the sprue: the channel the material is poured through into the mold.
Diameter of the sprue. The app warns you if it’s small for the material: cement needs at least 12 mm, resins are fine with 5 mm.
Adds vents, thin channels the air escapes through while you pour. In the rigid mold one is added at each air pocket of the figure (high points where a bubble would stay).
Diameter of the vents. 2–3 mm lets the air out without losing much material.
Prints a separate funnel that fits into the sprue: you fill it without spilling and it acts as a reserve while the material shrinks (soap, wax).
For candles: opens a vertical hole through the center for the wick and adds a small bar that keeps it centered and taut while the wax cools.
Diameter of the wick you’ll use (with a bit of play).
Planter
Parametric cement planter mold: it doesn’t need an STL.
Shape of the planter seen from above: round, hexagonal, octagonal or square.
Outer width of the planter at the opening (top).
Outer width of the planter at the base. Smaller than the top gives a conical planter that demolds easily.
Outer height of the finished planter, from the base to the rim.
Thickness of the cement wall. 10–15 mm is strong; less may crack.
Thickness of the cement bottom. 15 mm or more keeps it from breaking when you lift it full of soil.
Diameter of the drainage hole in the bottom. 0 doesn’t make one.
Thickness of the planter mold’s printed walls (outer mold and core). 2–2.4 mm holds the cement.