What it’s for
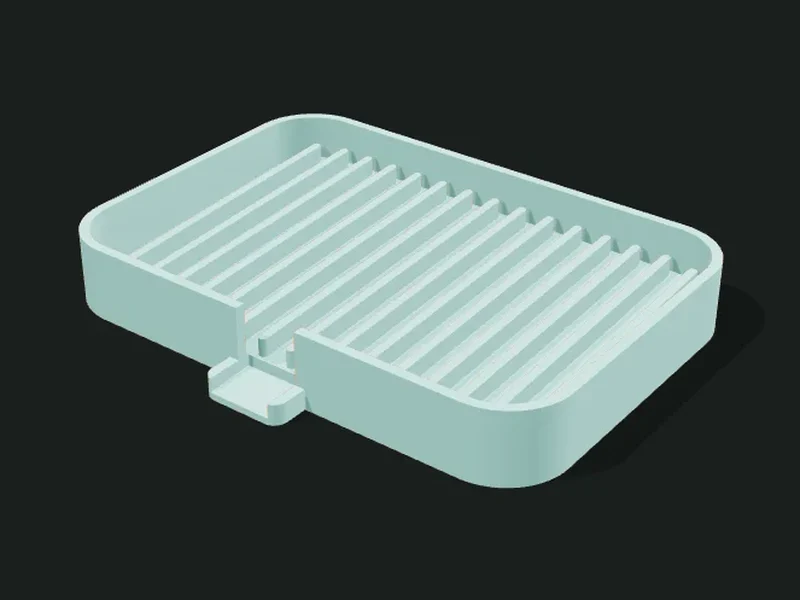
A soap dish that doesn’t leave the soap sitting in water. It has ribs or pins the soap rests on and three ways to drain: a sloped floor with a spout that sends the water into the sink, a grate over a tray that collects the water, or through slots for the shower. It can be rectangular, oval or corner-shaped, and the shower version screws or sticks to the wall.
Ideas
- Sink soap dish with a spout that drains straight into the basin.
- Two-part soap dish (grate + tray) for the countertop, which stays dry.
- Corner shelf for the shower, for soap, solid shampoo or a sponge.
- Kitchen sponge holder next to the sink.
Step by step
- Choose a preset according to where it goes: sink, countertop, shower corner or wall shelf.
- In «Shape» choose rectangular, oval or corner, and its dimensions.
- In «Drainage» choose how the water leaves: spout, grate with tray or slots.
- In «Soap support» choose straight or wavy ribs, or pins, and their spacing.
- For the shower, choose whether it’s fixed with screws or tape and the height of the backplate.
- Export. With a grate, the grate and the tray come out as two parts.
Tips
- With a spout, place the soap dish with the spout toward the sink: the slope carries the water there.
- Print in PETG or ASA if it will always be wet; PLA can deform with hot water.
- Ribs 3–4 mm high keep the soap well away from the water; taller makes it unstable.
- Wall mounting is only available with through slots, because the water has to fall downward.
Presets
Parameters
Shape
Outline of the soap dish (seen from above), its dimensions and thicknesses.
Outline of the soap dish: rectangular, oval, corner with a quarter-circle front, or triangular corner. The corner ones go against two walls.
Length of the soap dish (X axis). A regular bar of soap is about 90 × 60 mm: 110–120 mm leaves margin.
Width of the soap dish (Y axis), from front to back.
Length of each side resting against the wall, in the corner versions.
Height of the outer rim. 15–20 mm is enough to keep the soap from falling out.
Rounding of the corners seen from above (in the rectangular version and in the triangle’s corner).
Thickness of the walls. 2 mm is sturdy and easy to clean.
Thickness of the floor. 2 mm is enough; with through slots 2.4 mm is better so it doesn’t flex.
Drainage
How the water leaves: floor with spout, grate over a tray or through slots.
«Sloped floor with spout»: the floor slopes toward a spout that drains into the sink (one part). «Grate + tray»: a perforated grate rests on a tray that collects the water (two parts). «Through slots»: the floor has slots and the water falls through (for the shower).
Tilt of the floor toward the spout. 3–4° drains well without the soap sliding.
Width of the drain spout. 12–16 mm lets the water out without splashing.
How far the spout sticks out from the rim. Longer moves the drip away from the base; 0 leaves just an opening.
Depth of the tray that collects the water under the grate.
Thickness of the grate. 2–3 mm is sturdy so it doesn’t bend under the soap.
Play between the grate and the tray. 0.4–0.6 mm goes in and out easily for washing.
Width of the floor slots the water goes through, between ribs. 2.5–3.5 mm lets the water through without small things falling out.
Soap rest
The ribs or pins the soap rests on, which keep it dry.
Shape of the support: straight ribs, wavy ribs (more decorative), pins (less contact with the soap) or smooth.
Height of the ribs or pins above the floor. 3–4 mm keeps the soap well away from the water.
Width of each rib or diameter of each pin. 1.6–2.4 mm is sturdy.
Distance between ribs or pins. 6–8 mm holds a bar of soap well; wider, the soap sinks between them as it wears down.
Wall mount
To hang it in the shower with screws or double-sided tape.
How it’s fixed to the wall: resting (not fixed), with two countersunk screws in the backplate or with double-sided tape. It only shows with through slots.
Height of the backplate resting against the wall, where the screws or the tape go. Taller holds it more firmly.
Outer texture
Decorative relief on the outer walls. It doesn’t change the inside sizes.
Relief on the outer walls. The texture is added outward: the inside and the wall thickness don’t change, so inserts and usable sizes stay the same. «Ribs» and «Flutes» are vertical, «Rings» horizontal, «Waves» helical and «Knurl» a diamond pattern that gives grip.
How far the texture sticks out (mm). 0.6–1 mm shows well without overdoing it; more than 2 mm adds a lot of material and print time.
Spacing between ribs, flutes or waves measured around the part. Small values give fine striping; large ones, bold. It should be at least 3 times the relief.
Vertical spacing between rings, waves or knurl diamonds. With 0.2 mm layers, less than 2 mm looks stepped.