What it’s for
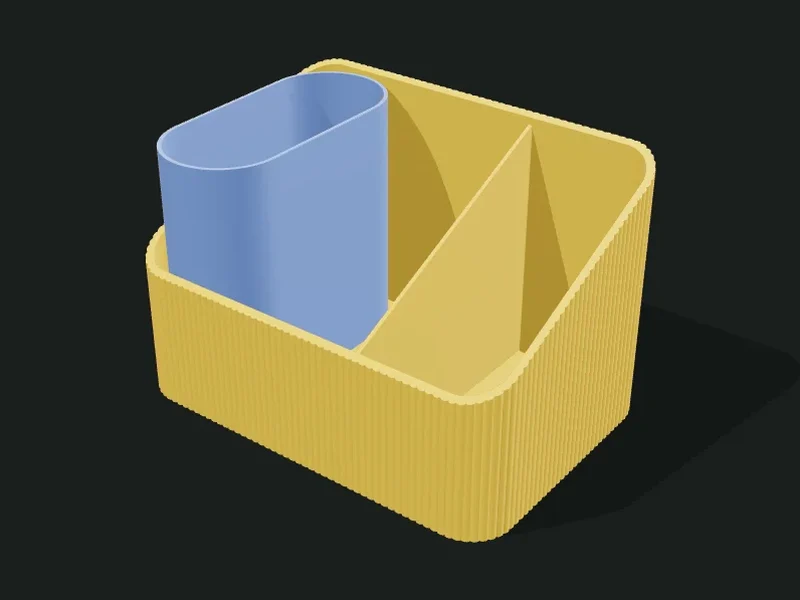
A desk organizer with a sloped rim (tall at the back, low at the front), dividers that follow that slope and, optionally, a capsule-shaped pencil cup printed separately that fits inside the box. The slope lets you see and grab everything inside without having to look from above.
Ideas
- Desk organizer: pens in the pencil cup and notebooks or phone in the rest.
- Remote control holder with 3–4 stepped crosswise slots.
- Low card or envelope holder, with dividers to sort by type.
- Tablet or book stand in the back slot.
Step by step
- Choose a preset: «Type 8» for the desk, «Remote holder» or «Low card holder».
- In «Body» adjust width, depth and the back and front heights (the difference sets the slope).
- In «Dividers» choose how many and in which direction: crosswise (side to side, stepped by the slope) or lengthwise (front to back).
- If you want a pencil cup, choose which side it goes on and its width and height.
- Add an outer texture if you want and check the «Exploded» view to see the pencil cup separately.
- Export: the body and the pencil cup come out as different parts.
Tips
- The front height must be lower than the back; the other way around the slope faces backward and the app warns you.
- If the dividers end up almost flush with the floor at the front, lower «Below the rim» or raise the front height.
- The pencil cup takes the full depth of one side: if it’s very wide, the lengthwise dividers get cramped in the rest.
- Print the pencil cup in another color so it stands out.
Presets
Parameters
Body
Outer dimensions and thicknesses. The top rim is a sloped plane between the back and front heights.
Outer width of the box, from left to right (X axis). It includes the walls; the outer texture sticks out a bit more.
Outer depth, from front to back (Y axis). It’s also the length of the pencil cup.
Height of the rim at the back. It’s the highest point of the box.
Height of the rim at the front. The lower it is compared to the back, the steeper the slope and the easier it is to see the contents.
Rounding of the corners seen from above. 10–20 mm gives a soft look; 0 leaves sharp corners.
Thickness of the outer walls. 1.6–2.4 mm is sturdy; under 1.2 mm may be flexible.
Thickness of the floor. 1.6–2 mm is enough for normal use.
Dividers
Fixed dividers that split the inside. They follow the rim’s slope.
Number of fixed dividers. 0 leaves a single space; with 1 divider you get two compartments, and so on.
«Crosswise» places the dividers side to side, spread from front to back: since they follow the slope, they end up stepped (ideal for remotes, cards or envelopes). «Lengthwise» places them front to back, spread over the width left free next to the pencil cup.
Thickness of each divider. 1.2–1.6 mm is sturdy; thinner may vibrate if the divider is tall.
How much lower than the rim the dividers are. 0 leaves them flush; a few millimeters keeps them hidden from outside and makes it easier to slip your fingers in.
Insertable pencil cup
A capsule-shaped cup (rounded sides) printed separately that goes into one side of the box.
Whether it has a fitted pencil cup and which side it goes on. It prints as a separate part and goes into that side of the box.
Width of the pencil cup (left to right). 40–50 mm fits pens and markers well; wider, scissors or rulers.
Height of the pencil cup. It can be taller than the box so it peeks out; the app warns you if it exceeds 220 mm.
Adds a half-height divider inside the pencil cup, splitting it in two (for example, pencils on one side and markers on the other).
Play between the pencil cup and the box. With 0.3–0.4 mm it goes in and out without jamming; raise it if it’s tight.
Thickness of the pencil cup’s wall. 1.2–1.6 mm is enough; thinner leaves more room inside.
Outer texture
Decorative relief on the outer walls. It doesn’t change the inside sizes.
Relief on the outer walls. The texture is added outward: the inside and the wall thickness don’t change, so inserts and usable sizes stay the same. «Ribs» and «Flutes» are vertical, «Rings» horizontal, «Waves» helical and «Knurl» a diamond pattern that gives grip.
How far the texture sticks out (mm). 0.6–1 mm shows well without overdoing it; more than 2 mm adds a lot of material and print time.
Spacing between ribs, flutes or waves measured around the part. Small values give fine striping; large ones, bold. It should be at least 3 times the relief.
Vertical spacing between rings, waves or knurl diamonds. With 0.2 mm layers, less than 2 mm looks stepped.