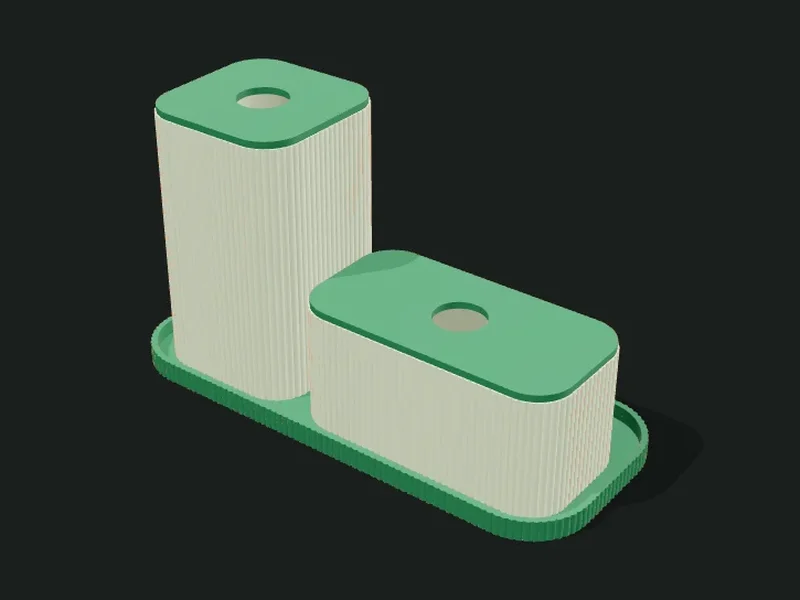
What it’s for
A set of canisters (containers with lids) in sizes of your choice, each with its fitted lid and a hole to lift it with your finger, plus a matching tray they all rest on. You can line them up automatically or arrange them by hand in a top view.
Ideas
- Spice jars or kitchen canisters with lids, on their tray.
- Bathroom canisters for cotton pads, swabs and hair clips.
- Desk set with lids to keep dust out.
- Gift or jewelry boxes in the same color.
Step by step
- Choose a preset: «Green set», «Spice trio», «L-shaped set (by hand)» or «Cotton pad box».
- In «Canisters» add or remove canisters and set the width, depth and height of each one.
- Choose whether they line up automatically or by hand; by hand, drag them in the top view.
- In «Lids» adjust the thickness, the lip that goes into the canister, the clearance and the hole.
- In «Tray» choose the margin, the rim height and whether you want extra free space.
- Check the «Exploded» view to see lids, canisters and tray separately and export.
Tips
- The lids are exported upside down (flat face down) to print them without supports.
- If the lid is loose, lower the clearance to 0.2 mm; if it doesn’t go in, raise it to 0.4 mm.
- The inner lip must be lower than the canister; otherwise, the app warns you.
- A tray over 220 mm may not fit your printer: arrange the canisters in an L or remove the tray.
Presets
Parameters
Canisters
How many canisters, their sizes and how they’re arranged.
List of canisters. For each one you set the outer width (w), depth (d) and height (h); in «By hand» mode also its X and Y position. Add, remove or duplicate canisters with the list buttons.
«Automatic in a row» places the canisters side by side, with the chosen spacing. «By hand» lets you move them with the mouse in a top view, to build L-shaped sets or groups.
Rounding of the canisters’ corners seen from above. High values give almost round canisters; the tray uses this radius plus the margin.
Space between canisters when they’re in a row. 6–10 mm leaves room to grab them from the side.
If the canisters have different depths, which side of the tray they line up on: all against the back, centered or against the front.
Thickness of the canisters’ walls. 1.6–2 mm is sturdy.
Thickness of the canisters’ floor. 1.6–2 mm is enough.
Lids
Each canister’s lid: thickness, fitting lip and hole to lift it.
Adds a lid for each canister. Without lids they stay as open cups.
Thickness of the lid’s flat part. 2.5–3 mm makes it sturdy; thinner may warp.
Height of the lip that comes down from the lid and goes inside the canister so it doesn’t shift. 0 leaves the lid resting without a fit; 4–6 mm locks it well.
Play between the lid’s lip and the canister’s inner wall. 0.3 mm stays firm without jamming.
Hole in the lid to lift it with your finger (or to take out cotton pads or napkins). Round, oval or no hole.
Size of the hole (diameter, or length if oval). 18–25 mm is enough for a finger; 35–45 mm to take out cotton pads.
Tray
The tray all the canisters rest on.
Adds a low tray all the canisters rest on together.
Free space between the canisters and the tray’s rim, on each side.
Extra length of the tray beside the canisters (only in automatic row), to leave free space for a spoon, keys or rings.
Height of the tray’s rim. 8–10 mm is enough to keep the canisters from sliding.
Thickness of the tray’s floor. 2–2.5 mm makes it sturdy.
Outer texture
Decorative relief on the outer walls. It doesn’t change the inside sizes.
Relief on the outer walls. The texture is added outward: the inside and the wall thickness don’t change, so inserts and usable sizes stay the same. «Ribs» and «Flutes» are vertical, «Rings» horizontal, «Waves» helical and «Knurl» a diamond pattern that gives grip.
How far the texture sticks out (mm). 0.6–1 mm shows well without overdoing it; more than 2 mm adds a lot of material and print time.
Spacing between ribs, flutes or waves measured around the part. Small values give fine striping; large ones, bold. It should be at least 3 times the relief.
Vertical spacing between rings, waves or knurl diamonds. With 0.2 mm layers, less than 2 mm looks stepped.