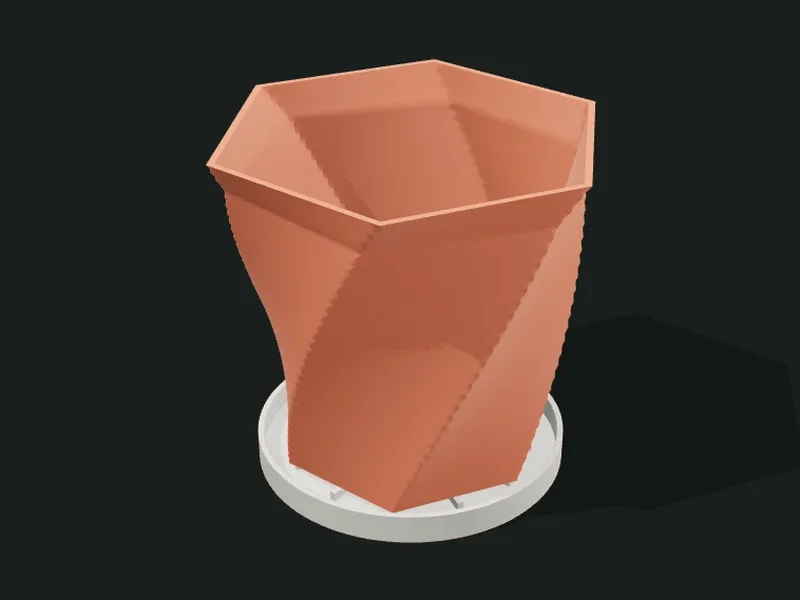
What it’s for
A tool to design objects of revolution (planters, vases, cups, bowls) by drawing their profile with a curve editor. On that shape you choose the section (round, polygon, star, flower), a twist along the height and stackable surface effects (flutes, facets, bubbles, waves, noise and many more). It comes out as a solid to print in vase mode, as a part with wall and bottom, or as a planter with drainage and saucer.
Ideas
- Vases in vase (spiral) mode: fast, light and translucent.
- Planters with drainage holes and a matching saucer.
- Pencil cups, decorative bowls and candle holders.
- Shades and decorative pieces with complex textures.
Step by step
- Choose a preset close to what you want.
- Tap the «Profile» thumbnail to open the curve editor: move the points (radius and height) and their handles to shape the silhouette. The window shows the 3D result alongside.
- Choose the «Section»: round, polygon, star, flower or rounded square, and add twist if you want it to rotate along the height. With «Top section» the opening can have another shape (for example, round at the bottom and square at the top).
- In «Surface effects» add cards (flutes, facets, bubbles…); each one can be limited to a band of height.
- In «Output» choose vase mode, part with wall or planter with drainage and saucer.
- Switch the quality to «High» before exporting.
Tips
- For vase mode, export as «Solid» and turn on «Spiral vase» (vase mode) in the slicer: the slicer makes a single continuous wall.
- Design in «Draft» or «Normal» quality, which is faster, and switch to «High» only for exporting.
- Walls leaning out more than 45° may need supports, especially at the base.
- Effects only add material outward: they never thin the wall.
- A 30–90° twist on a polygon or flower section gives a very striking swirl effect.
Presets
Parameters
Shape
The silhouette (profile), the size and the twist.
Silhouette of the object seen from the side: each point has a radius (distance to the axis) and a height. Tap the thumbnail to open the editor: drag the points, add or remove points, and use the handles to curve the line. A point can be a corner (break) or smooth (continuous curve).
Enlarges or shrinks the whole object evenly (100 % = profile size). It doesn’t change the wall or bottom thickness.
How many degrees the section rotates from the base to the top. 0 leaves it straight; 45–90° gives a swirl; negative values rotate the other way.
Section (top view)
The shape seen from above: a single one for the whole height, or one at the bottom and another at the top (with an optional middle one) that morph into each other.
Shape of the object seen from above: round, straight-sided polygon, pointed star, flower with rounded petals, or square with rounded corners.
Your own section, drawn in a window seen from above. You draw a segment and it repeats around («Symmetry»); with «Mirror» each segment is reflected, ideal for petals and teeth. Each point is smooth (curve) or a corner (straight segment): double-click to switch it. It comes with sample shapes: petals, waves, star, gear, drop, heart and clover.
Number of sides of the polygon or points of the star or flower.
How pronounced the points of the star or the petals of the flower are, as a fraction of the radius. 0.1 is soft; 0.3 very deep.
Rounding of the polygon’s corners: 0 leaves a sharp edge (hard); as you raise it the corners soften, and at 1 the section becomes round. The flat faces don’t move: the rounding trims the corners.
Shape of the opening (top). With «Same as bottom» the section is the same over the whole height; if you choose another, the part morphs from the bottom section to the top one, for example from round at the bottom to square at the top.
The drawn section used at the top (at the opening). It’s edited like the bottom one, in the window seen from above.
Number of sides or points of the top section.
How pronounced the points or petals of the top section are, as a fraction of the radius.
Rounding of the corners of the top section, from hard (0) to soft (1).
A third shape halfway up. The part goes from the bottom section to the middle one and from there to the top one: for example round, hexagonal and round again.
The drawn section used halfway up. It’s edited like the bottom one, in the window seen from above.
Number of sides or points of the middle section.
How pronounced the points or petals of the middle section are, as a fraction of the radius.
Rounding of the corners of the middle section, from hard (0) to soft (1).
How the shape change is spread along the height: «Smooth» changes more in the middle and barely at the ends; «Even» changes the same over the whole height; «Changes early» morphs near the base; «Changes late» keeps the bottom shape and changes near the opening.
Surface effects
Relief added on top of the shape, like layers.
List of surface effects (flutes, rings, spiral, diamonds, waves, bubbles, facets, noise, scales, honeycomb, voronoi, bricks, zigzag, pleats, image, rim and smooth zone, which covers the previous ones on one side of a straight, diagonal or wavy line). They add up in order and each one can be limited to a band of height with «From» and «To». See the «Surface effects» page for what each one does.
How fine the surface mesh is. «Draft» and «Normal» are fast for designing; «High» is recommended for exporting; «Maximum» is worth it with fine effects. «Ultra» (0.2 mm) and «Extreme» (0.12 mm) build the mesh directly, without the solids engine: they reach 4 and over 10 million triangles, with very clean edges on ribs and rims. The file is big (export as 3MF, which compresses) and the slicer takes longer to load it. With «Wavy rim» and a wall it goes up to «Maximum».
3D ornament
Your own STL (a flower, a leaf, a shield) curved over the wall, fused or as a separate part.
Your own STL (a flower, a leaf, a shield, a butterfly) that curves over the wall of the part: its back follows the surface, even with a belly, twist, drawn section or effects. Flat-backed, bas-relief style models work best; it must be a closed solid.
Which side of the STL faces outward. «Automatic» takes the model’s smallest dimension as the thickness, so it lies flat whether it comes lying down or standing up. If the ornament ends up backwards or edgewise, choose the face by hand: top (model lying down), front (standing) or side.
«Seat the whole back»: measures the ornament’s underside and gently flattens it against the wall, keeping the thickness and relief of the front; a curved leaf or flower sits fully attached, with no air underneath. «As is»: the model isn’t deformed and only its lowest part sinks into the wall.
Height of the ornament on the wall. Width and relief grow in the same proportion.
Rotates the ornament on the wall (for example, to tilt a flower or set a leaf diagonally).
Height of the ornament’s center, in % of the height of the part.
Where it goes around: 0° is the front of the view, 90° the right side, 180° the back.
How many copies of the ornament are spread around (for example, 6 flowers around the planter).
How far the back of the ornament goes into the wall so it stays attached. It never exceeds 70 % of the wall, so it doesn’t go through.
«Fused»: the ornament becomes one body with the part. «Separate part»: it comes out just as the STL came, to print in another color and glue on; the wall gets a 0.4 mm mark with its outline. With the Ultra and Extreme qualities it always comes out separate.
Output
How it’s exported for printing: vase mode, with a wall, or planter with drainage.
«Solid for vase mode»: exports the solid volume to print in spiral mode (the slicer makes the wall). «With wall and bottom»: hollow with the chosen thickness, to print normally. «Planter with drainage and saucer»: the same, plus drainage holes and a separate saucer.
Wall thickness when the output is with a wall or a planter. 1.6–2.4 mm is sturdy; the effects are added on the outside.
Thickness of the bottom. 2–3 mm is sturdy; in big planters, more.
Diameter of each drainage hole in the planter’s bottom. 8–12 mm lets the water out without losing soil.
Number of drainage holes. 1 goes in the center; with more they’re spread in a circle.
Adds a separate saucer that collects the watering runoff. The planter rests on ribs in the saucer, so the water drains and doesn’t sit stagnant.